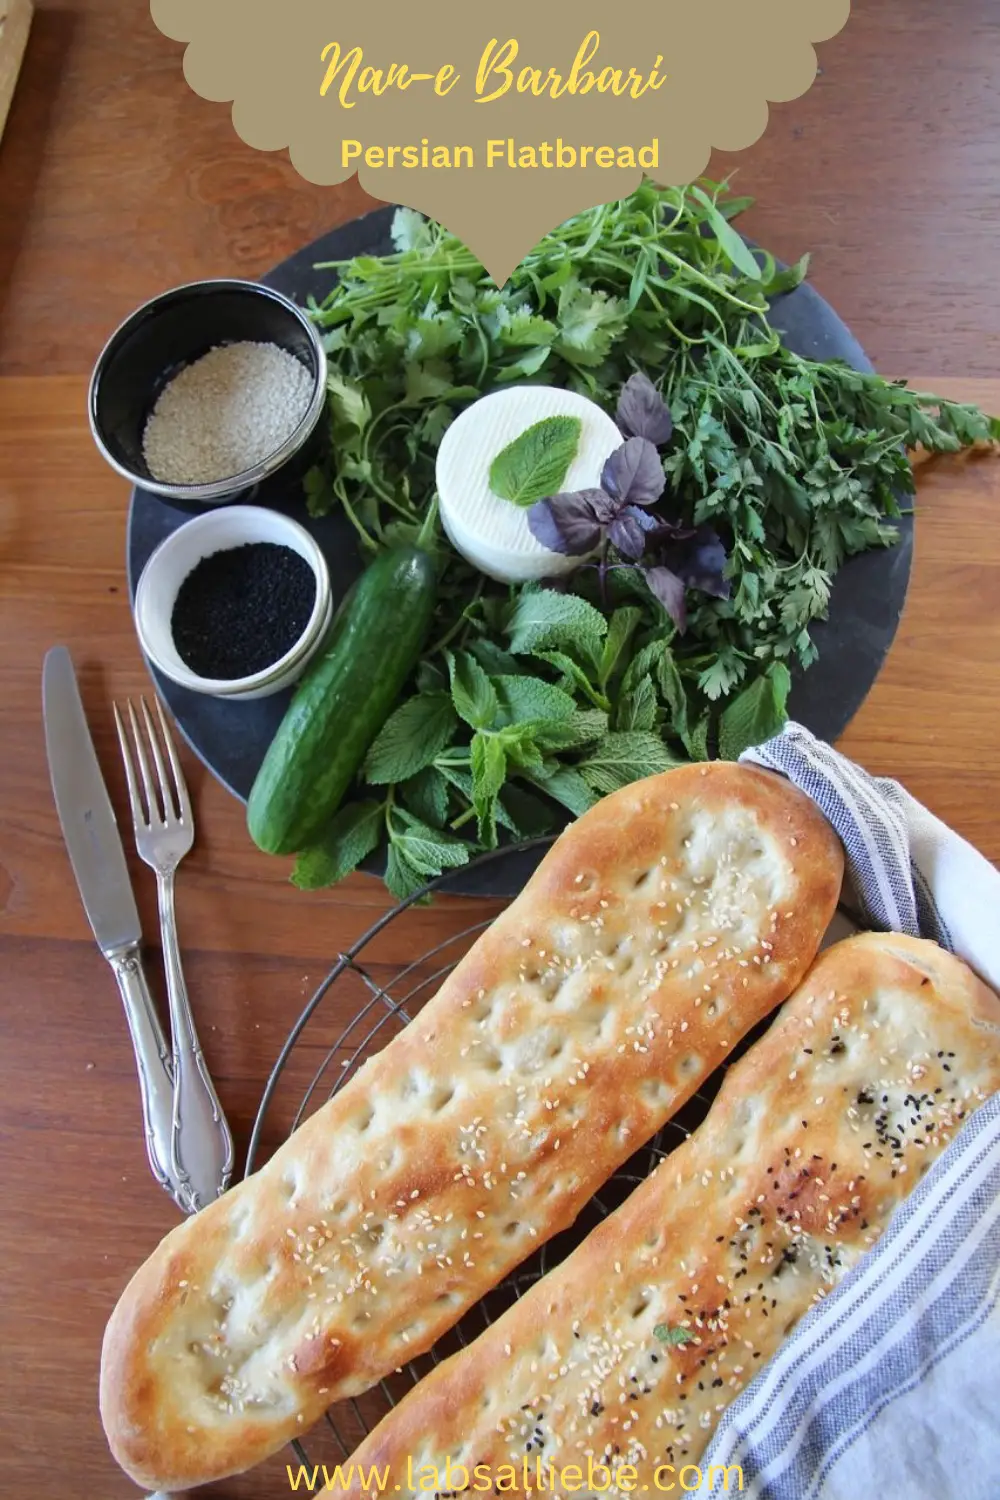
Nan-e Barbari is a Persian flatbread, usually 70 – 80 cm long, and tastes best fresh from the oven. It is most baked and sold in Iran. The bread is very similar to the Turkish flatbread, but not quite so thick and round but thin and oval. If you plan a trip to Iran, you should visit a Noonvai – a persian bakery. The bread is baked in the morning, at noon and in the evening ,fresh and in front of your eyes. Each bakery is specialized in one type of bread and bakes it in a stone oven. In Iran, we have four different types of breads baked in stone ovens, for example Nan-e Sangak is from rye flour and is baked on pebbles, Nan-e Lavash is wafer-thin patties made from wheat flour without yeast, and Nan-e Taftoon is from whole wheat flour.
NAN-E BARBARI KHANEGI
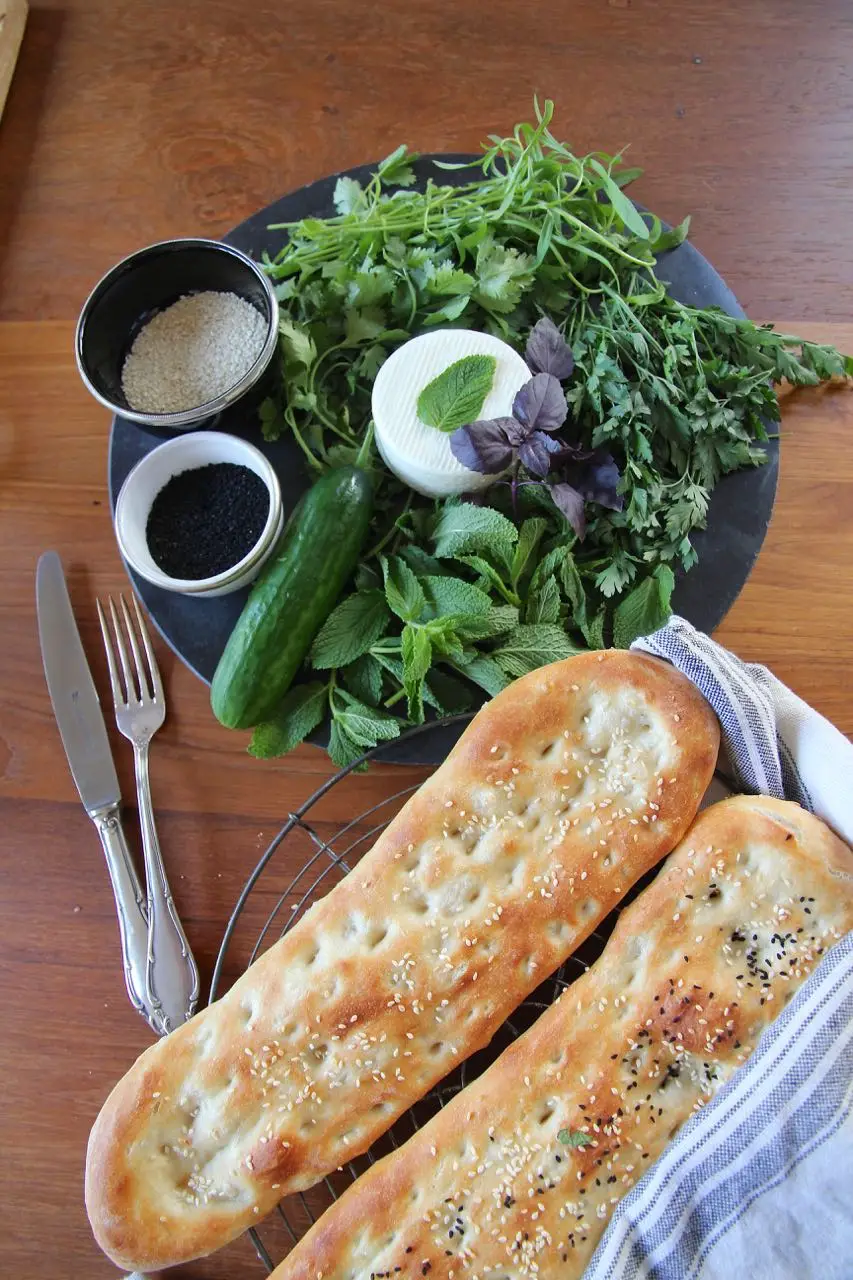
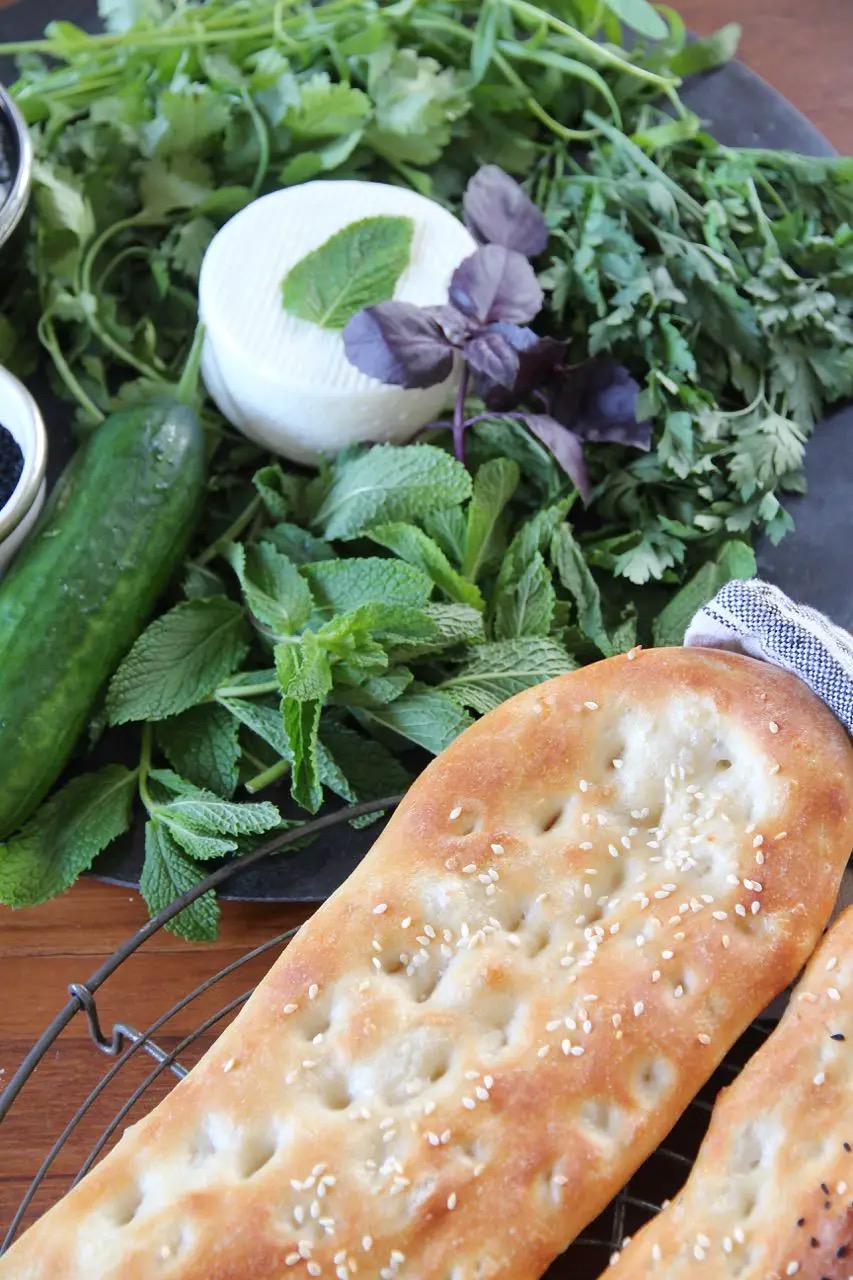
Nan-e Khaneghi is a homebaked version. My aunt even had a wood oven made of clay in her backyard and baked her bread, for she had to feed ten hungry children. I loved watching her getting up early in the morning, sifting the wood-burning stove, and baking her finished dough pieces one by one in the oven. The smell of freshly baked bread filled the rooms and stimulated our senses. The bread tastes the most delicious as long as it is still oven-warm. In the meantime, we children prepared breakfast because Nan-e Barbari is served with us for breakfast, with some honey and cream, or for the savory variant with sheep’s cheese. See here, and here I prepared a Persian breakfast for Mother’s Day.
NOONVAI – PERSIAN BAKERY
At home, my mom usually sent my brother and me to the bakery in the evening. In Tehran, you have to queue up at the Noonvai – barbari bakery. I love the scent of freshly baked bread, the blazing fire in the oven, and the conversations in line, while some jokers were making fun. When it was my turn, the baker asked how many loaves I wanted to have and started baking. What I love about Persian bread is that no bread is like the other. On the wall was a bar with long nails mounted, and bread was nailed to cool for a few minutes before handing them out to the customers. My mom always gave me extra money since she knew my brother and I ate the first bread on the way home.
SYNCHRON BAKING NAN-E BARBARI
Zorra from “Kochtopf 1xumrühren bitte” and Sandra from “From Snuggs Kitchen” organized a synchron baking about Nan-e Barbari. I had the idea to bake Persian bread myself, and I was searching on “Google” for Nan-e Barbari. The Blog “Kochtopf 1xumrühren bitte” popped up, and Zorra invited everyone to join them for baking. So I immediately decided to jump into this adventure of Synchron baking. Zorra and Sandra got the recipe from the blog of Chili and Ciabatta. Please check out the other blogs, as everybody has baked the bread differently, for example, Sandra with spelt flour. As a result, wonderful different Nan-e Barbaris have come out, and all taste delicious.
Sandra von From-Snuggs-Kitchen
Zorra von 1x umrühren bitte aka kochtopf
Tamara von Cakes, Cookies and more
Birgit M. von Backen Mit Leidenschaft
Sonja von soni-cookingwithlove
Dagmar von Dagmar’s brotecke
Simone von zimtkringel
Julia von baking.julia
Birgit D von Birgit D – Kreativität in Küche, Haus & Garten
DIFFERENT VERSIONS OF BAKING NAN-E BARBARI
There are two different methods to bake Nan-e Barbari. In the 1st version, a pre-dough we call “biga” is made about 12 hours before baking and left to rest so that the dough doesn’t taste so yeasty and the yeasts can develop and outgas. In the 2nd variant, the dough is made with more yeast and left to rise for only 60 minutes.

NAZAR BACKERY IN DARMSTADT
I have a tip for you – in Darmstadt, there is the bakery Nazar, which makes even Nane-e Barbari and bakes in the charcoal oven. For one euro you can buy a body Nan-e Barbari. Most of the time, I buy several pieces of bread, cut them into toasters just slices, and then freeze them. If necessary, I bake the frozen bread briefly in the toaster. However, my family and I agree that home-made bread tastes much better than the purchased one.

TIPS FOR THE PERFECT NAN-E BARBARI
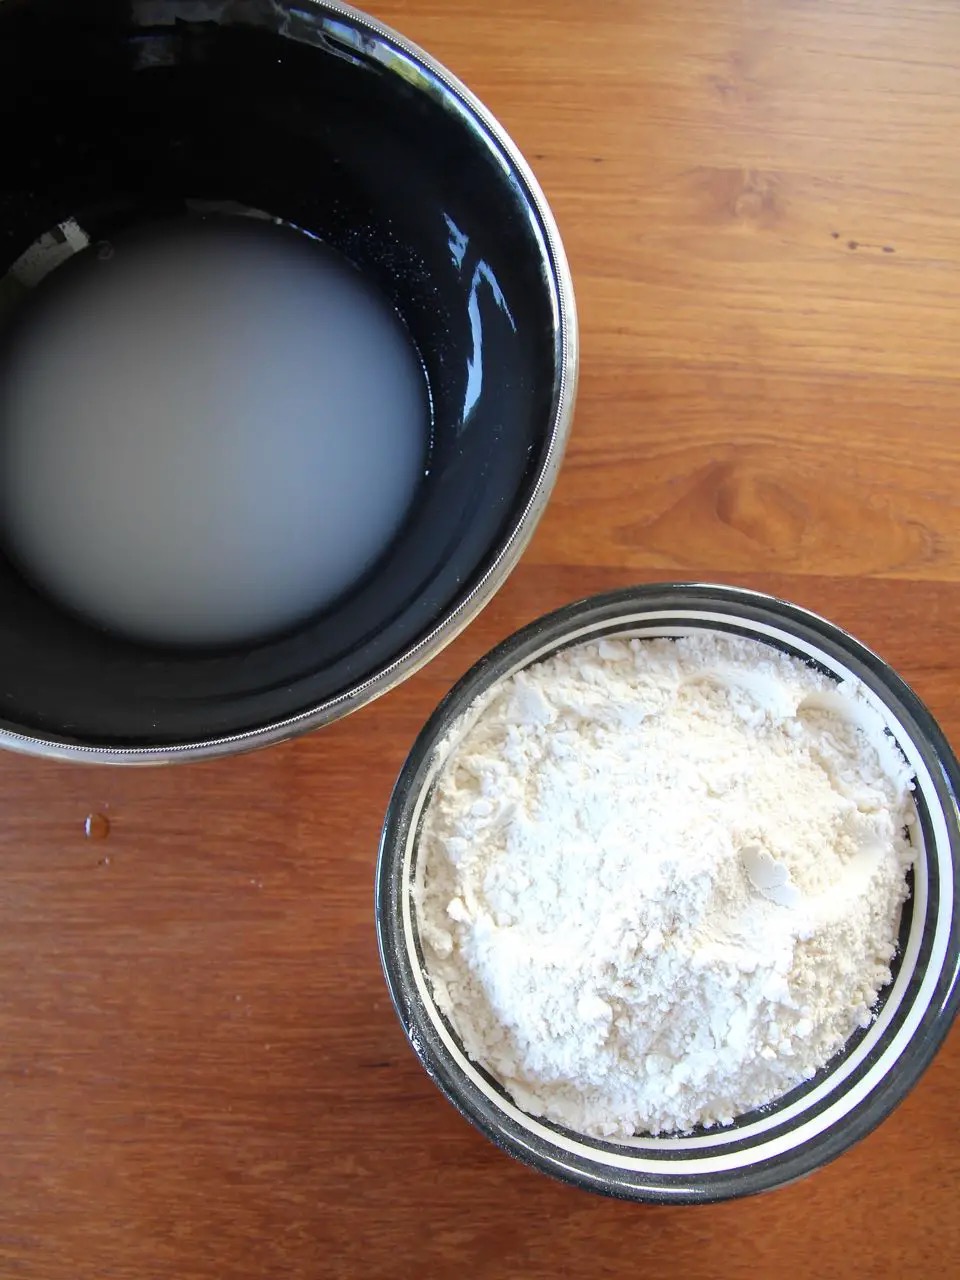
First, add yeast to lukewarm water and let it ferment for 5 minutes.
Knead the dough for at least 15 minutes until it is smooth and elastic. It allows the gluten proteins to combine well, so the dough rises much better. I don’t own a food processor, so this was quite a workout in the heat last Sunday.
Very important is the ROO-MAL, which translates as spread on top. (ROO=on top and MAL=spread). It is a mix of wheat flour and water. Prepare it about 1 hour before baking, and let it cool down. Spread the Roo-Mal on top of the formed dough. I use my hands to spread the Roomal on the bread. This way, I can feel whether the entire bread surface is covered. Roo-mal gives Nan-e Barbari the typical orange color and crispiness while baking.
You can also bake the dough on a baking stone* on your barbecue.
For special occasions, my aunt adds a little saffron* to the dough.
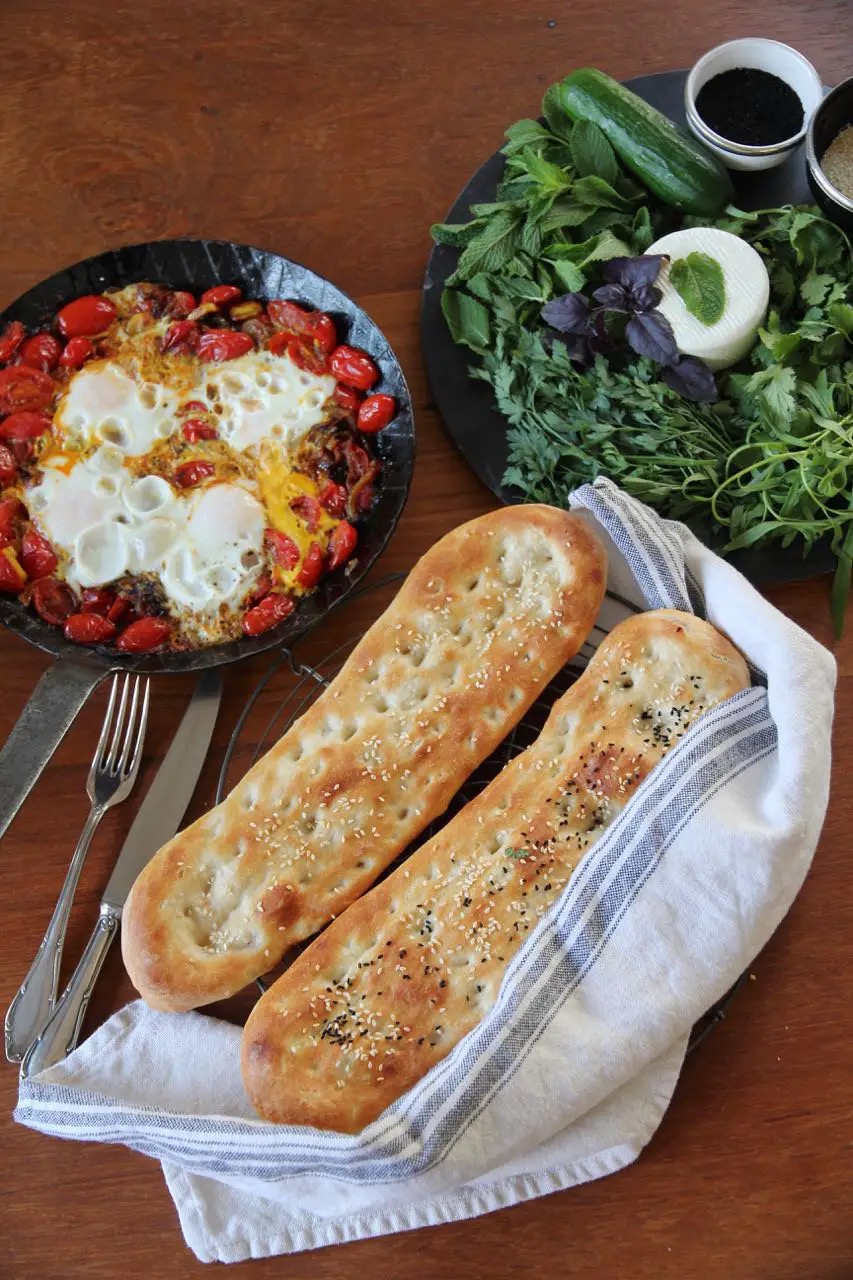
INGREDIENTS FOR 3 NAN-E BARBARI
380 g of lukewarm water
0.5 g fresh yeast
1 tsp salt
550 g wheat flour type 550*
Wheat semolina* for the work surface
INGREDIENTS FOR ROO-MAL
1 tsp wheat flour*
3 tsp of water
TOPPING
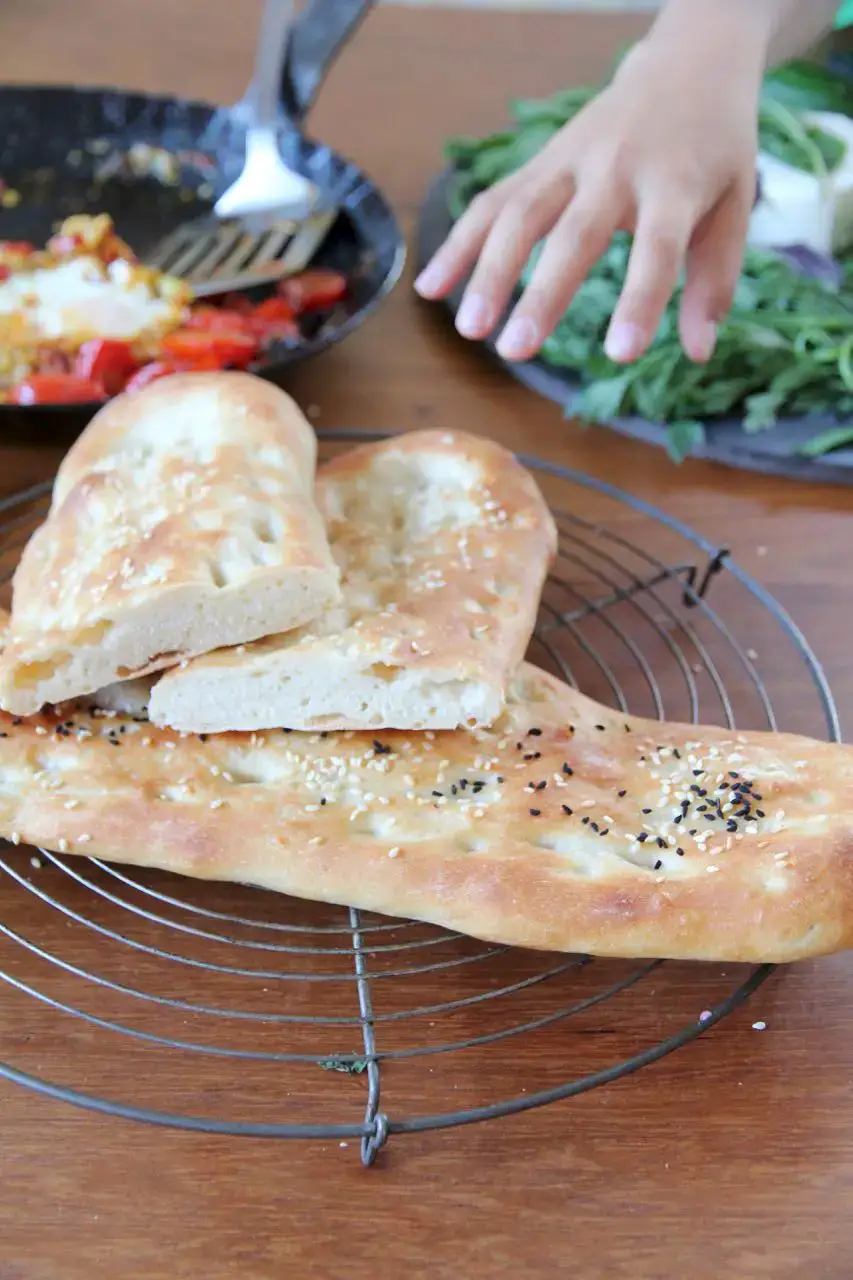
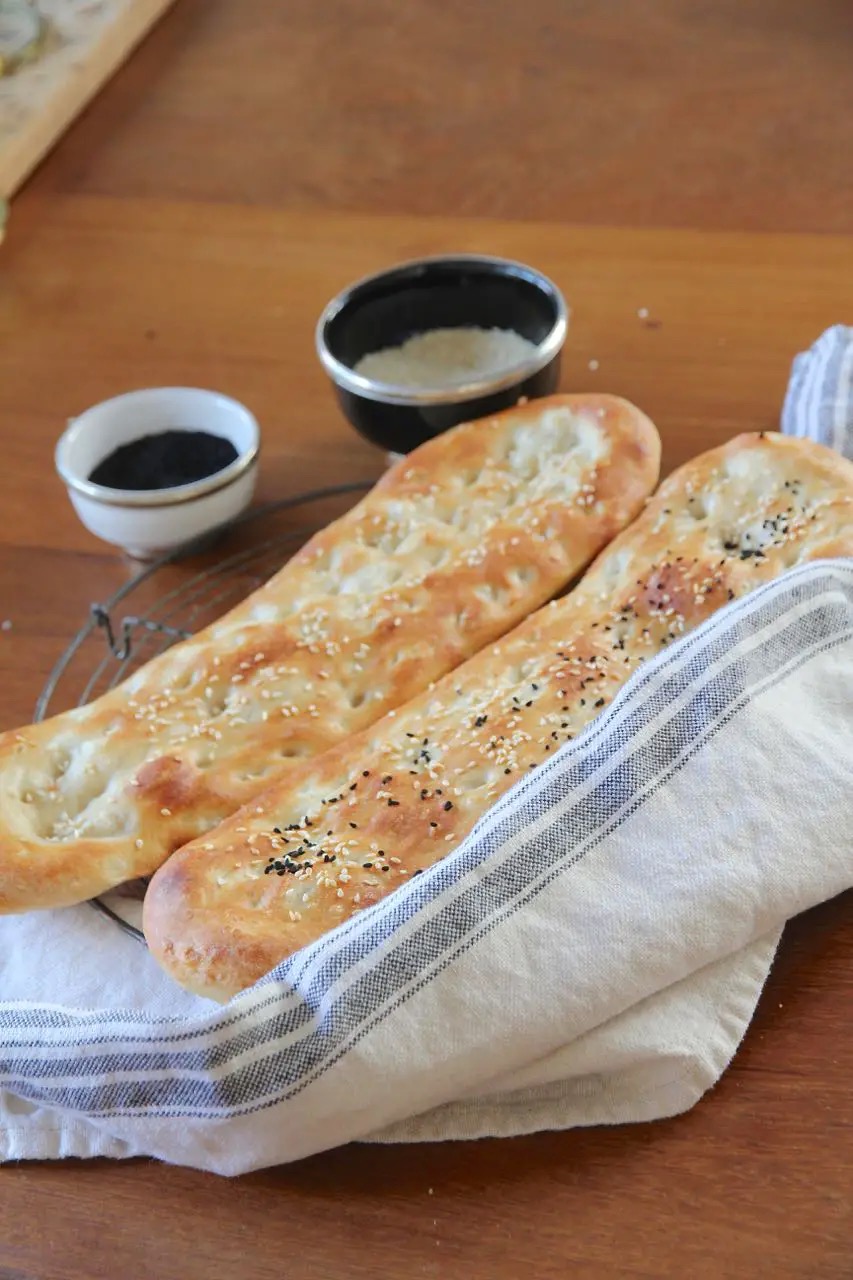
sesame seeds* and black cumin*
PREPARATION NAN-E BARBARI
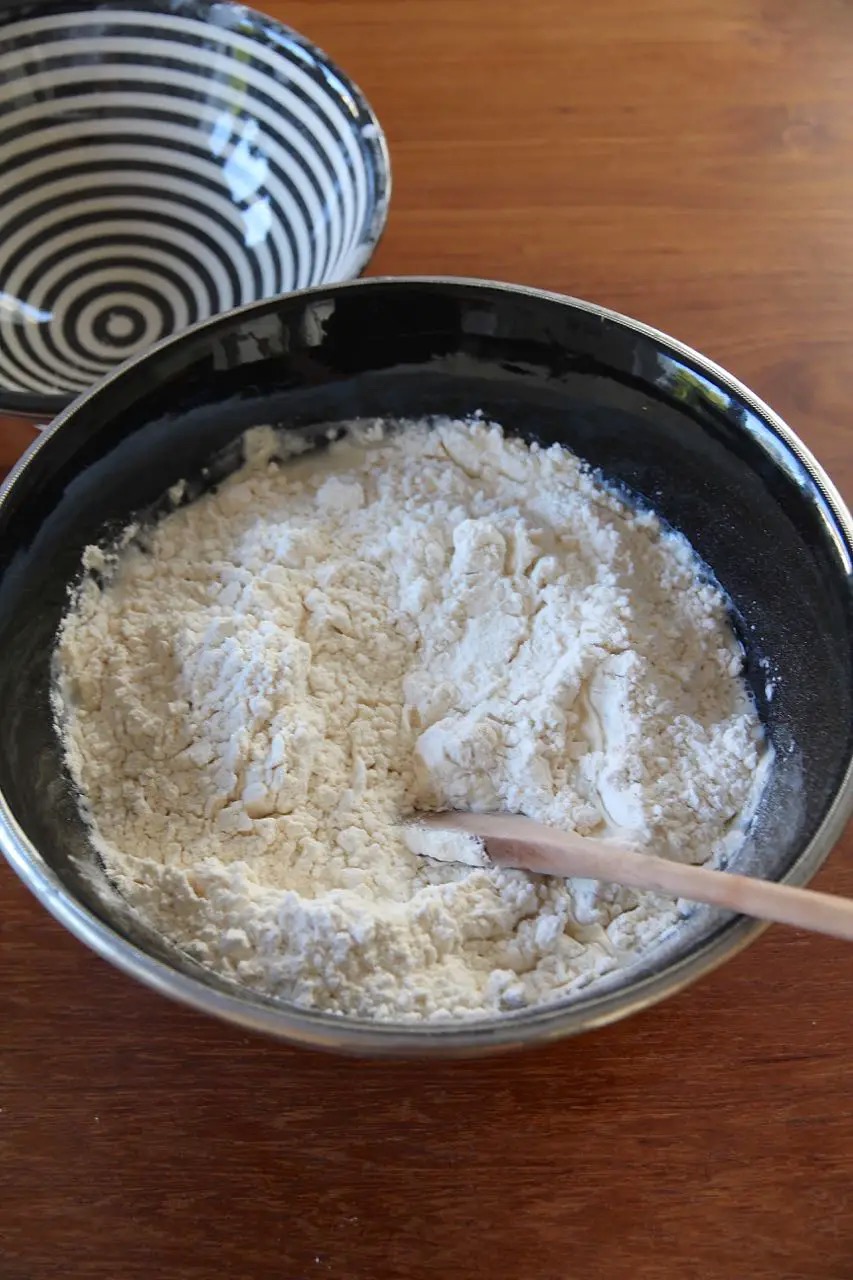
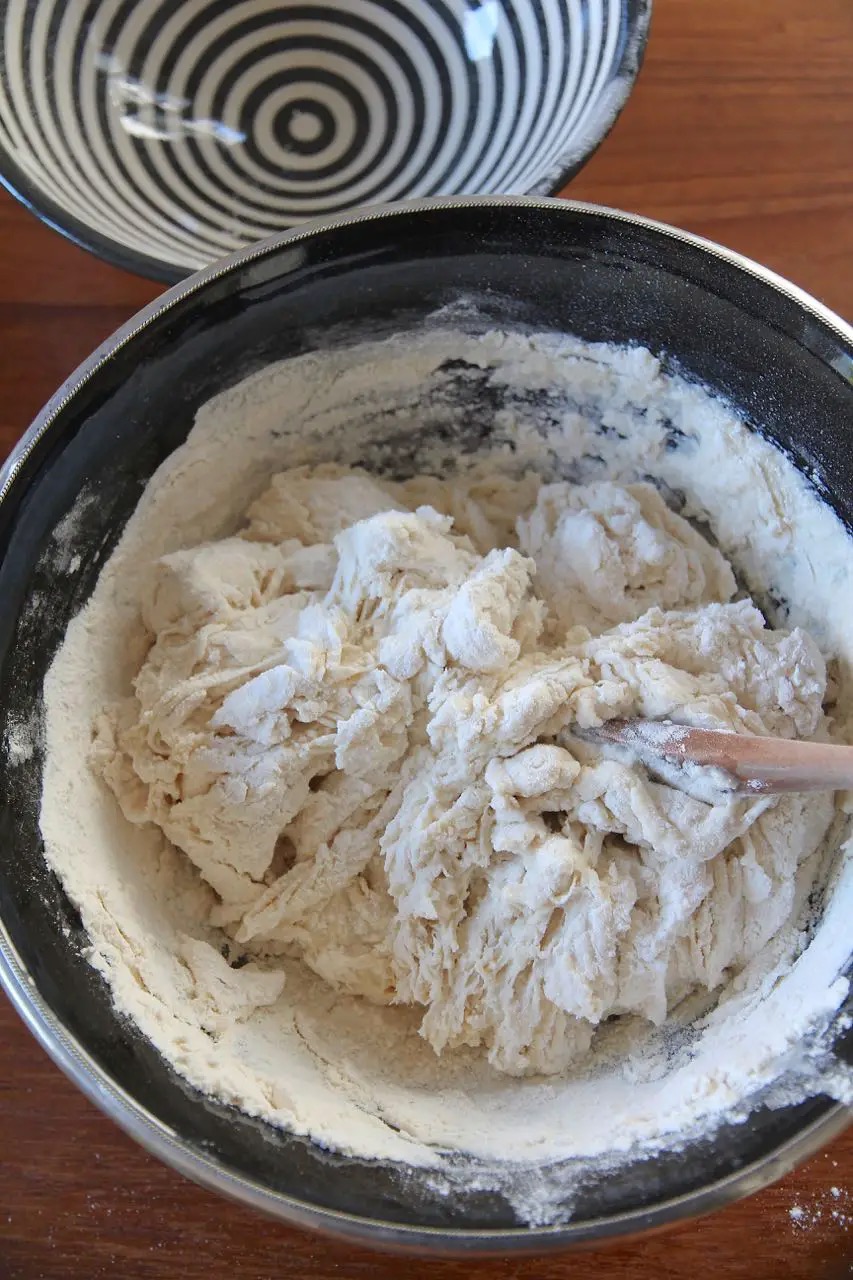
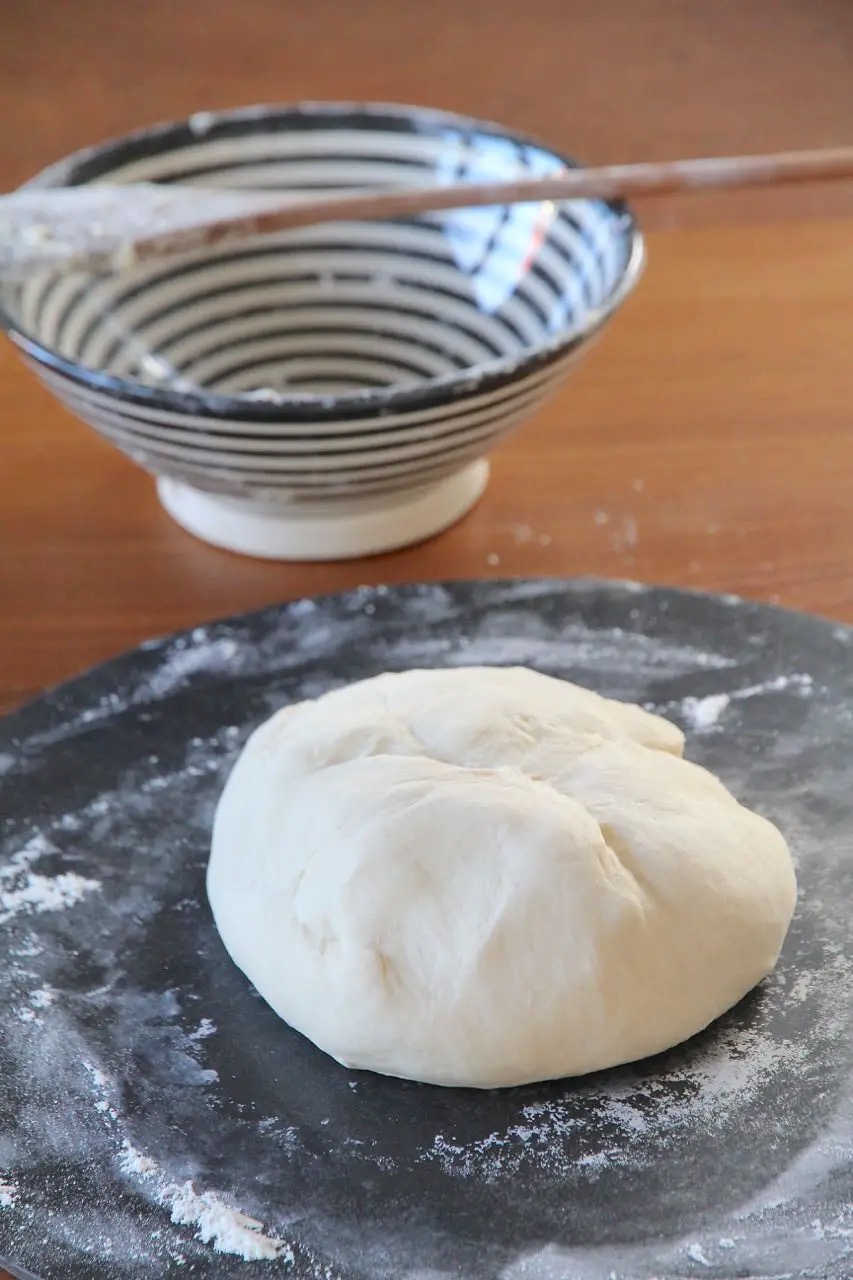
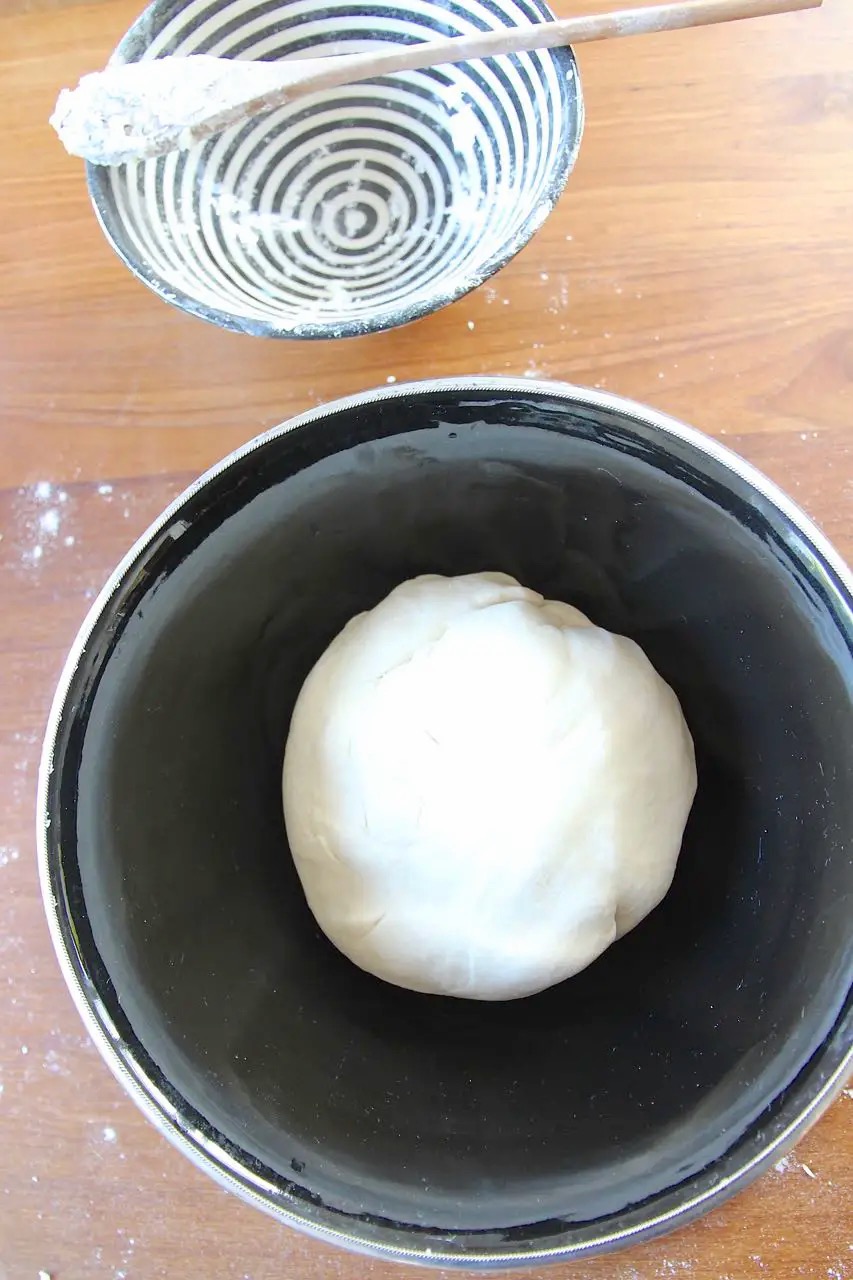
Dissolve fresh yeast in lukewarm water and set aside for 5 minutes. Mix flour with salt, pour into the water, stir with a wooden spoon, and knead until you achieve a smooth dough. Let it rest for 20 minutes. Take it out of the bowl, and shape it into a round ball. Place in a clean bowl covered with a dishcloth for 10 – 11 hours (overnight), and let it rise to room temperature.
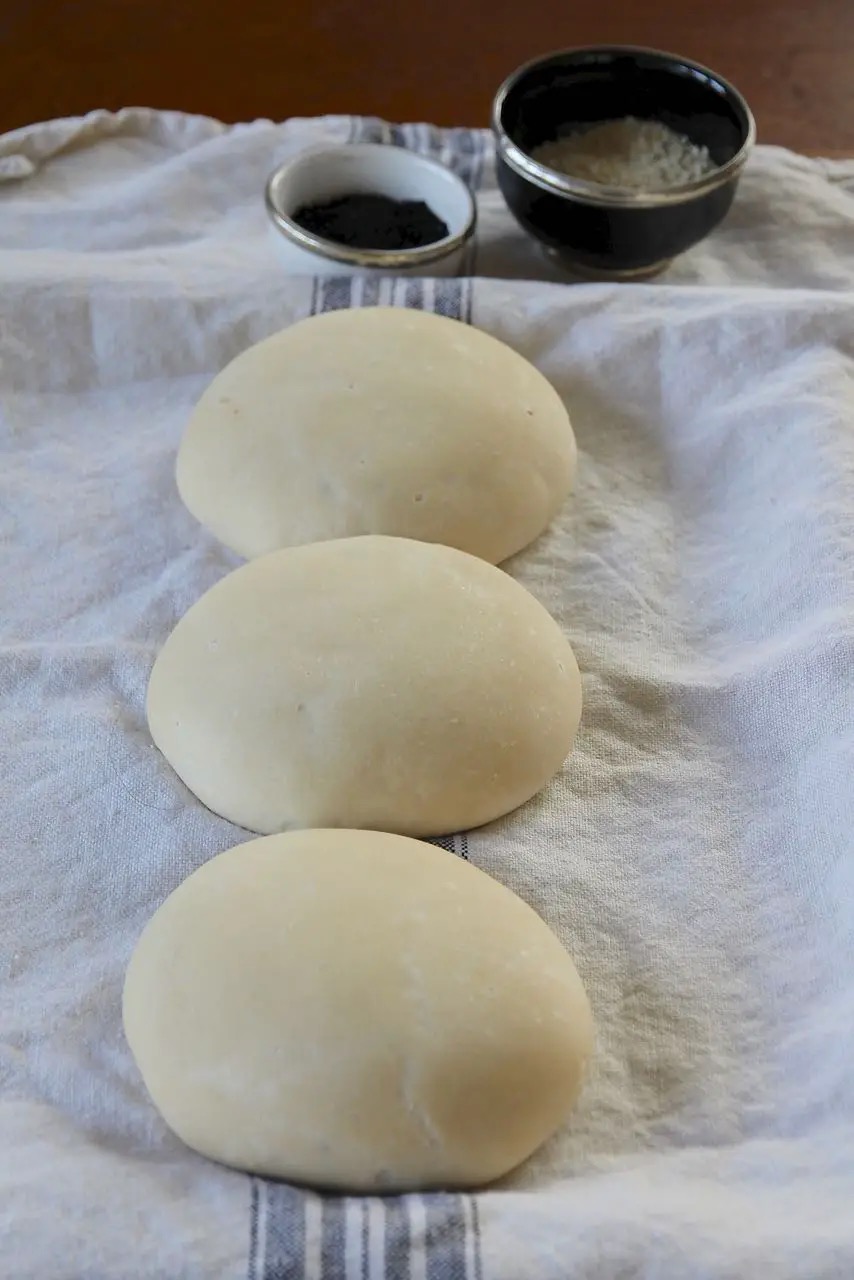
The next day divide the dough into three portions, shape it into balls, put it on a baking sheet covered with a linen cloth, and cover it with a dishcloth. Let it rest for 4 hours.
Preheat the oven to 250 °.
Those who own a baking stone* can use this. I baked the bread on a baking sheet lined with baking paper.
PREPARATION ROO-MAL
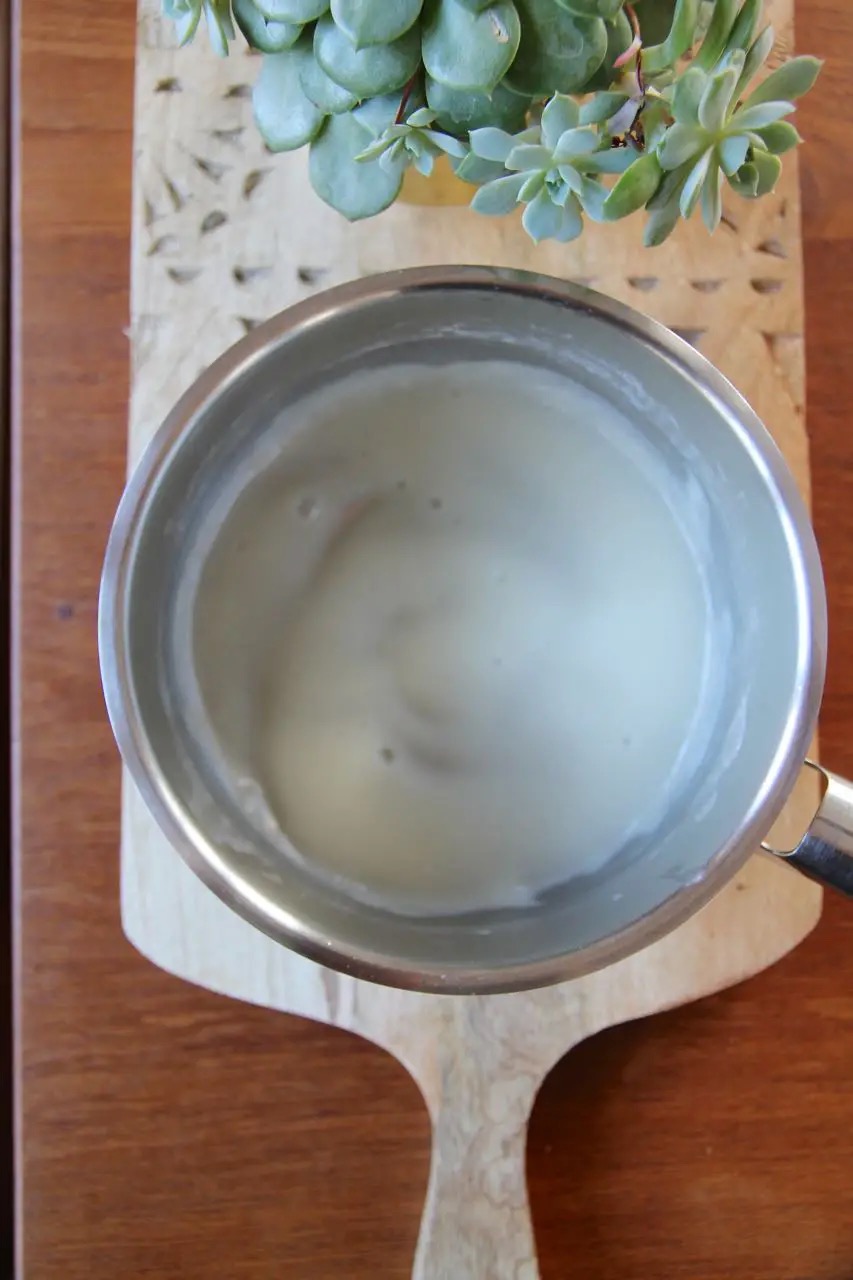
In the meantime, prepare the ROO-MAL. In a pot, mix cold water and flour. Bring to a boil briefly until it forms a paste.
Let cool down.
Take one of the three doughs, flour your hands and the work surface, and knead it for about 5 minutes. The dough is very elastic.
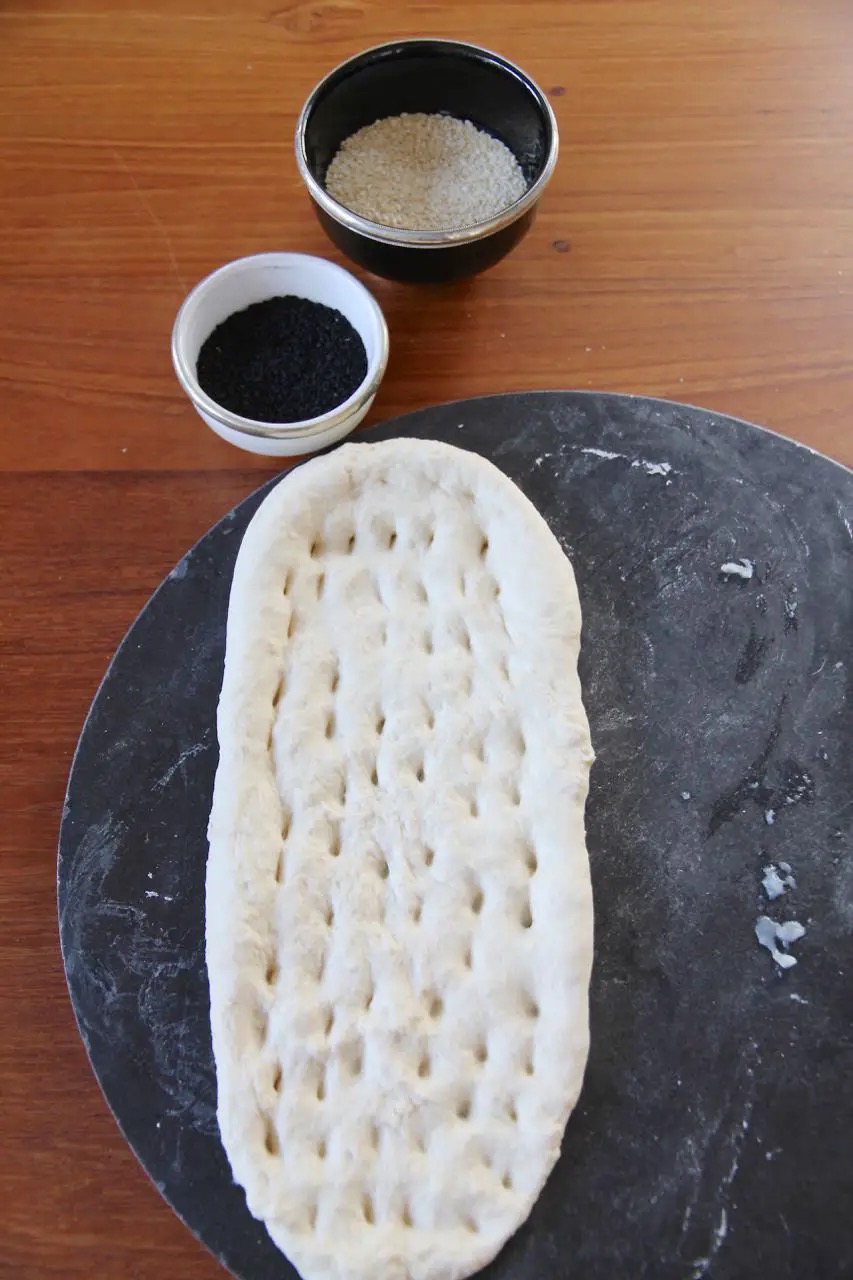
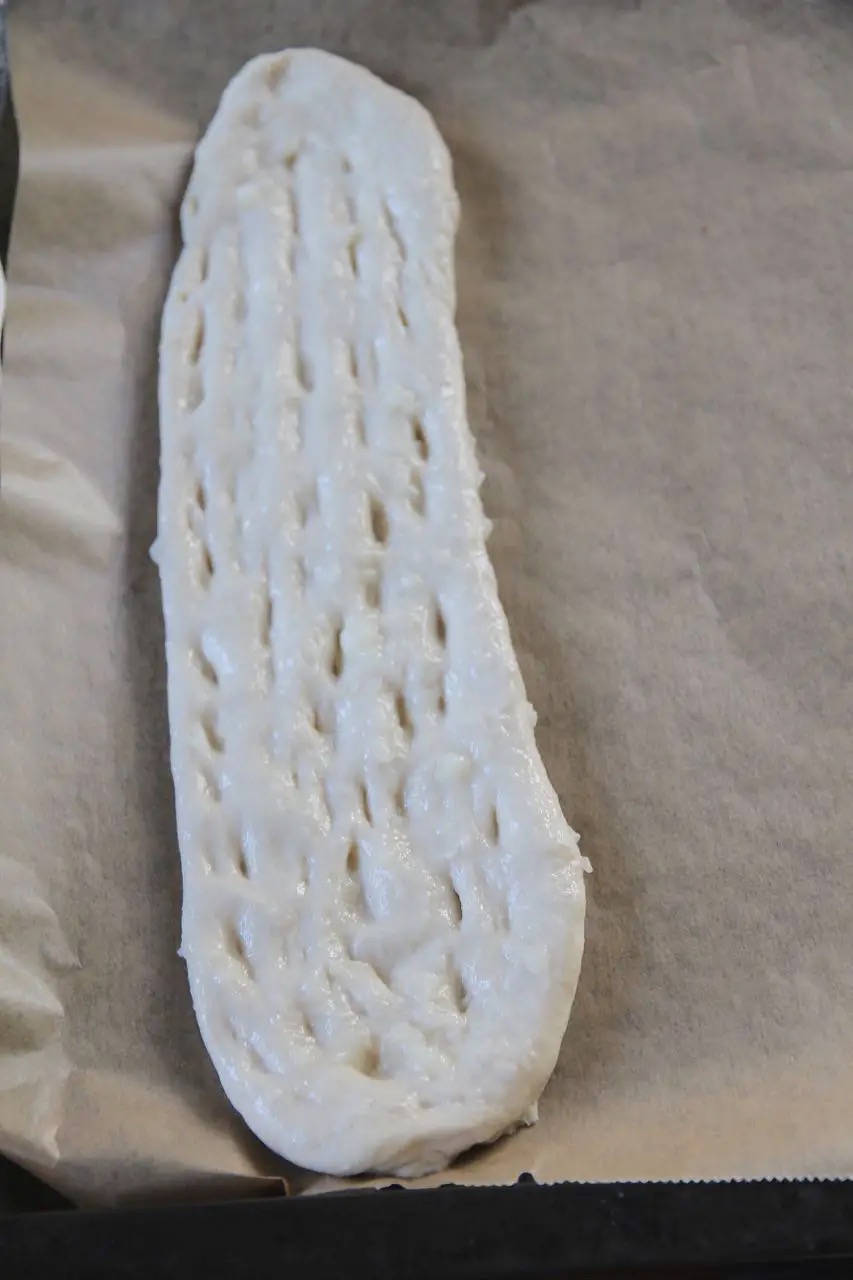
Sprinkle the work surface with wheat semolina. Place dough on work surface and pull it into an oval shape. Form your hand into a fist, and press along the grooves in the dough. The bread goes this way in width.
Put two teaspoons of ROO-MAL on the bread and brush gently, don’t forget the edges.
Press along the grooves again. I made one bread with sesame seeds, the other with black seeds, and the third with sesame and black seeds. The baking tray should now be near you. Grab the bread up and down, and while you transport it to the baking tray, pull it apart easily.
Do this very quickly, or the dough will tear apart. According to the recipe, it should bake for 10-12 minutes, but mine took 15 -17 minutes until they were golden brown.
Tastes best fresh from the oven.
BEFARMAYID!
Susan
The items marked with * are affiliate links, referral links. If you buy through this link, I get a small commission. The price stays the same for you and you can easily support my efforts. A big thank you ♥

Nan-e Barbari – Persian Flatbread
A Persian flatbread and tastes best fresh from the oven.
Ingredients
INGREDIENTS FOR 3 NAN-E BARBARI
- 380 g lukewarm water
- 0,5 g fresh yeast
- 1 tsp salt
- 550 g wheat flour type 550
- a handful wheat semolina for the work surface
INGREDIENTS FOR ROO-MAL
- 1 tsp wheat flour
- 3 tsp water
TOPPING
- sesame seeds and black cumin
Instructions
PREPARATION NAN-E BARBARI
-
Dissolve fresh yeast in lukewarm water and set aside for 5 minutes.
-
Mix flour with salt, pour into the water, stir with a wooden spoon, and knead until you achieve a smooth dough.
-
Let it rest for 20 minutes.
-
Take it out of the bowl, and shape it into a round ball.
-
Place in a clean bowl covered with a dishcloth for 10 – 11 hours (overnight), and let it rise to room temperature.
-
The next day divide the dough into three portions, shape it into balls, put it on a baking sheet covered with a linen cloth, and cover it with a dishcloth. Let it rest for 4 hours.
-
Preheat the oven to 250 °.
-
Those who own a baking stone for the oven can use this. I baked the bread on a baking sheet lined with baking paper.
PREPARATION ROO-MAL
-
In the meantime, prepare the ROO-MAL. In a pot, mix cold water and flour. Bring to a boil briefly until it forms a paste.
-
Let cool down.
-
Take one of the three doughs, flour your hands and the work surface, and knead it for about 5 minutes. The dough is very elastic.
-
Sprinkle the work surface with wheat semolina. Place dough on work surface and pull it into an oval shape.
-
Form your hand into a fist, and press along the grooves in the dough. The bread goes this way in width.
-
Put two teaspoons of ROO-MAL on the bread and brush gently, don’t forget the edges.
-
Press along the grooves again. I made one bread with sesame, the other with black seeds, and the third with sesame and black seeds.
-
The baking tray should now be near you. Grab the bread up and down, and while you transport it to the baking tray, pull it apart easily. Do this very quickly, or the dough will tear apart.
-
According to the recipe, it should bake for 10-12 minutes, but mine took 15 -17 minutes until they were golden brown.
Recipe Notes
Tastes best fresh from the oven.
Save the recipe for later on Pinterest!
Have you cooked this or maybe another delicious recipe of mine? Feel free to leave me a comment below. If you tag your picture on Instagram with @labsalliebe and use the hashtag #labsalliebe, I won’t miss a post and will be happy to leave you a comment as well. Can’t wait to see your creations.
♥♥♥♥♥♥♥♥♥♥♥♥♥♥♥♥♥♥♥♥♥♥♥♥♥♥♥♥♥♥♥♥
This website is created by me in my leisure under proper use of coffee 🙂 If you like my posts I would be happy if you donate me one or a few cups of coffee!
Donate an amount of your choice via Paypal.
♥♥♥♥♥♥♥♥♥♥♥♥♥♥♥♥♥♥♥♥♥♥♥♥♥♥♥♥♥♥♥♥♥♥♥♥♥
Sign up for my newsletter and I’ll email you my latest recipes, travel reports and trends 1 at most 2x a week for free.
Persian Barbari isn’t similar to Turkish flatbread at all. Persian Barbari tastes so good!
Dear Logon,
Absolutely, Persian Barbari is in a league of its own!
It’s like the VIP of flatbreads, strutting its stuff with that perfectly golden crust and soft, fluffy inside.
Turkish flatbread is great, but Barbari? That’s the bread you dream about.
Khosh amadid,
Susan